
Yes, you can do yoga after a hip replacement surgery, but you must do it safely and with great care. It is very important to follow your doctor’s advice and work closely with a physical therapist. They can help you find out when you can start yoga after hip replacement and how to do it without harming your new hip joint. Starting slow with gentle yoga for hip replacement recovery is key.
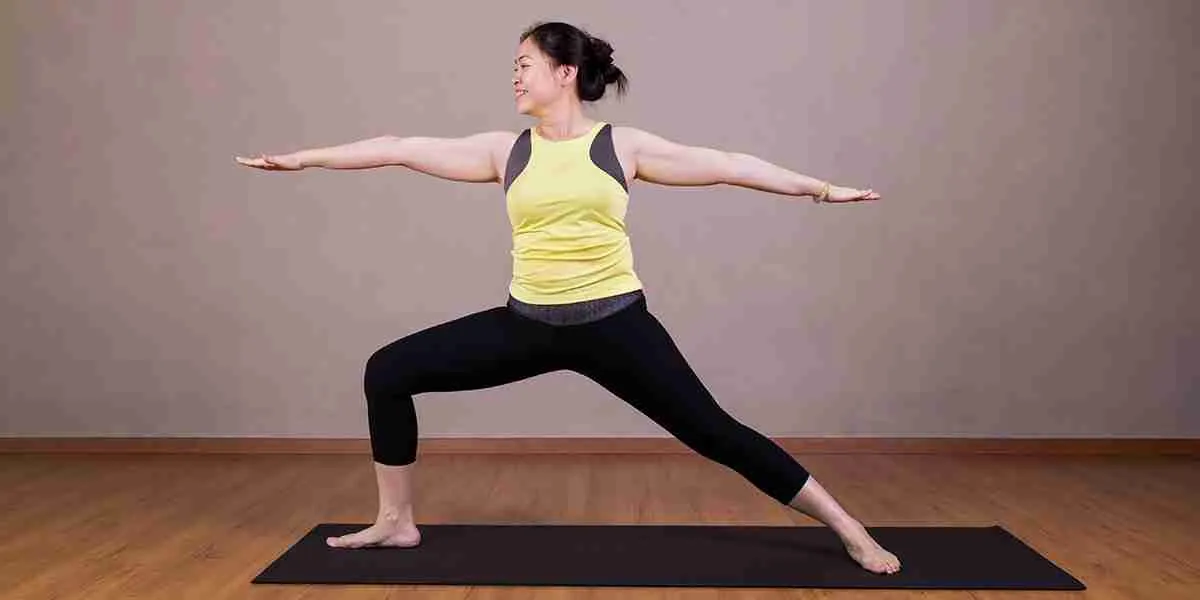
Image Source: www.jointreplacementhawaii.com
The Path Back to Movement
Getting a new hip can change your life. It helps stop pain and makes it easier to move again. Many people want to go back to activities they love, like yoga. Yoga is good because it can help your body in many ways. It makes you stronger and helps you move better. It also helps you feel calm.
But after surgery, your hip is healing. It needs time. You must be careful not to move it in ways that could cause problems. Some yoga moves are not safe right after hip surgery. Knowing which yoga poses safe after hip replacement and which ones to avoid is very important.
Grasping Why Care Is Needed
Hip replacement surgery changes how your hip works. The doctor puts in new parts. These parts need time to become stable inside your body. There are certain ways you must not move your hip to keep the new parts in place. This is often called hip precautions.
The exact rules depend on the type of surgery you had. Your doctor or physical therapist will tell you your specific hip precautions. These rules usually involve limits on:
- Bending your hip too much (like bringing your knee close to your chest).
- Crossing your legs past the middle of your body.
- Turning your leg or foot too far in or out.
Breaking these rules could make the new hip joint come out of place. This is called dislocation. It is a serious problem that needs more medical help. This is why returning to yoga after hip surgery timeline and doing only gentle, approved moves is a must.
When to Start Your Yoga Journey Again
Thinking about when to start yoga after hip replacement? There is no single answer that fits everyone. It depends on how well you are healing and what your doctor and physical therapist say.
Most people start with a physical therapy program soon after surgery. This therapy is key to getting your strength and movement back. It teaches you safe ways to move. Yoga is often something you can add after you have made good progress in physical therapy.
The Healing Timeline
Your hip heals over time. Here is a general idea of the returning to yoga after hip surgery timeline:
- Right After Surgery (First few weeks): You focus on basic movements given by your physical therapist. You might do simple things like ankle pumps or very small leg slides while lying down. No yoga is usually done at this stage.
- Weeks 4-8: You are likely doing more active physical therapy. You might be able to walk short distances. Some very gentle stretching might be possible, but only if your therapist says it is okay. You might start thinking about gentle yoga for hip replacement recovery, but check first.
- Months 2-6: Your hip is much stronger. You have likely finished or are finishing physical therapy. You can likely do more daily activities. This is often when people can start trying simple, modified yoga poses. You will still need to follow hip precautions.
- Six Months and Beyond: You may have fewer hip precautions, or none at all, depending on your doctor’s advice. You can likely do more types of exercises. You can slowly try more yoga poses. Still, listen to your body and avoid moves that cause pain or feel unsafe.
It is very important to get a clear okay from your surgeon and physical therapist before you try any yoga pose. They know how your surgery went and how you are healing.
Collaborating with Medical Helpers
Working with your doctor and physical therapist is key to doing physical therapy and yoga for hip replacement safely.
Talking to Your Surgeon
Before you start thinking about yoga, talk to your hip surgeon. Ask them:
- When can I start light exercise besides physical therapy?
- What are my hip precautions? How long do I need to follow them?
- Are there any specific movements or positions I should never do with my new hip?
- Is yoga okay for me? When might I be ready?
Your surgeon gives the main okay to start new activities.
Working with Your Physical Therapist
Your physical therapist is your guide for moving safely after surgery. They will:
- Show you safe ways to sit, stand, walk, and climb stairs.
- Give you exercises to make your hip and leg muscles strong.
- Help you get back your range of motion (how far you can move your hip).
- Watch how you move and help you fix bad habits.
Tell your physical therapist you want to do yoga. They can:
- Tell you if you are ready for yoga based on your progress.
- Help you find yoga modifications after hip replacement that are right for you.
- Show you how to do yoga poses safely while following your hip precautions.
- Suggest gentle yoga for hip replacement recovery practices.
It is best to start yoga under their guidance or with a yoga teacher who understands hip replacements and has talked with your therapist.
The Good Things About Yoga After Hip Surgery
Doing yoga after hip replacement can have many benefits of yoga post hip surgery:
- Makes Muscles Stronger: Gentle yoga builds strength in the muscles around your hip and leg. Strong muscles help support your new joint.
- Helps You Move Better: Yoga can help improve your flexibility and range of motion over time, making it easier to do daily things.
- Gets Rid of Stiffness: Gentle stretching can help reduce stiffness that can happen after surgery.
- Improves Balance: Yoga often includes poses that help you balance. Better balance lowers the chance of falling, which is very important after hip surgery.
- Reduces Pain: Moving gently can help ease pain by reducing stiffness and improving blood flow.
- Helps You Feel Calm: Yoga includes breathing and being mindful. This can help lower stress and make you feel better in your mind.
- Better Body Awareness: Yoga teaches you to pay attention to your body. This helps you know what feels right and what does not, which is key for safety.
Remember, these benefits come when you do yoga safely and at the right time in your recovery.
Starting Slow with Gentle and Calming Yoga
When you first start yoga after surgery, think ‘gentle’ and ‘restorative’. Gentle yoga for hip replacement recovery means moving slowly and easily. Restorative yoga after hip replacement uses props like blankets and blocks to help you relax and support your body in gentle stretches.
These types of yoga are good because they:
- Do not put too much stress on your new hip.
- Focus on simple movements.
- Help you learn how your body feels in different positions.
- Give you time to breathe and be calm.
Look for classes or videos called “gentle yoga,” “chair yoga,” or “restorative yoga.” Make sure the teacher knows about hip replacements or that you tell them about your surgery before class starts. This way, they can help you with yoga modifications after hip replacement.
Safe Yoga Poses After Hip Replacement
Many yoga poses can be done safely after hip replacement, if you follow your hip precautions and make changes. These are yoga poses safe after hip replacement when done correctly.
H5 Poses While Sitting in a Chair
Chair yoga is a great way to start. The chair helps you balance and takes pressure off your hip.
- Chair Mountain Pose: Sit tall, feet flat on the floor. Rest hands on your thighs. Breathe deeply. This helps with posture.
- Chair Cat-Cow: Sit tall. For Cat, round your back, pull your belly in, and drop your head. For Cow, arch your back, lift your chest, and look up a little. Move slowly with your breath. This helps warm up your spine.
- Chair Spinal Twist: Sit tall. Twist gently to one side, holding the back of the chair. Keep your spine long. Do not twist too far. Repeat on the other side. Helps spine flexibility.
- Chair Leg Raises: While sitting tall, gently lift one foot a little off the floor, keeping your leg straight. Hold briefly, then lower. Repeat on the other side. This works your leg muscles lightly.
- Chair Hip Marches: While sitting, gently lift one knee up a little toward your chest. Do not lift too high, staying within your hip precaution limits (no deep bending). Lower and switch legs. This works hip flexor muscles lightly.
H5 Poses Lying Down
Lying on your back can be safe as long as you avoid crossing your legs or turning your leg too much.
- Supine Mountain Pose (Savasana): Lie flat on your back, legs straight or slightly bent with support under your knees. Arms by your sides. This is a resting pose. Good for breathing and relaxing.
- Gentle Knee to Chest (Single Leg): Lie on your back. Gently bend one knee and bring it a little toward your chest. STOP before you reach your hip bending limit. Use your hands on the back of your thigh (not on the knee) to gently guide it. Keep the other leg straight or bent with foot flat. Crucially, do not bring the knee too high – stay well within your hip precaution angle. This helps gently stretch the hip and lower back.
- Bridge Pose (Modified): Lie on your back, knees bent, feet flat on the floor hip-width apart. Gently lift your hips a little off the floor. Do not lift high. Keep your hips straight (do not let one side drop). This works butt and back of thigh muscles.
- Reclined Spinal Twist (Gentle, Modified): Lie on your back, knees bent, feet flat. Gently let your bent knees fall a small amount to one side. Do not let them go far. Keep both shoulders on the ground. You can place a pillow between your knees or under the bottom knee. This is a very gentle twist.
H5 Poses Standing (with Support)
Using a chair or wall for support is wise when standing.
- Mountain Pose: Stand tall with feet hip-width apart. Feel your feet on the ground. Stand next to a wall or chair for balance. Good for posture and balance.
- Chair Pose (Modified): Stand facing a chair or wall for support. Gently bend your knees as if sitting back into a chair. Do not bend too deeply. Keep your back straight. This works leg muscles.
- Warrior II (Modified): Stand facing sideways to a chair or wall. Step one foot back a comfortable distance, turning the back foot out a little. Keep the front knee bent over the ankle (do not let it go past the ankle). You can hold the chair or wall. Stretch arms out (or keep one hand on support). This builds leg strength. Be careful with the back hip; do not let it turn too much.
- Triangle Pose (Modified): Stand facing sideways to a chair or wall. Step feet wide apart. Turn one foot out. Reach the hand on that side down to a chair seat or block, or rest forearm on your thigh. Reach the other arm up. Use chair/wall for support. This stretches the side body and legs. Be careful not to twist your hips too much.
Always move slowly and carefully into and out of each pose. If something hurts, stop right away.
Yoga Poses to Avoid After Total Hip Replacement
Just as some poses are safe, others are not. It is important to know the yoga poses to avoid after total hip replacement, especially while you still have hip precautions. These poses can put your new hip at risk.
H4 Movements and Poses That Break Hip Precautions
- Deep Hip Bending: Avoid poses where your thigh comes close to your chest, past the 90-degree angle limit. Examples:
- Full Knee-to-Chest
- Child’s Pose (can cause deep bending)
- Forward Folds (especially if rounding your back and bending hips deeply)
- Deep Squats
- Crossing Legs Past Midline: Avoid any pose where one leg crosses over the other leg or the middle line of your body. Examples:
- Eagle Pose
- Cow Face Pose
- Sitting Cross-Legged (unless you can do so with very little hip bend and no crossing)
- Many seated twists where you cross one leg over the other knee.
- Big Hip Turns (Internal or External Rotation): Avoid twisting your leg/foot too far in or out from the hip joint. Examples:
- Lotus Pose or Half Lotus
- Placing the sole of your foot high on the inner thigh (like in Tree Pose, especially if turning the hip out widely). You can do a modified Tree Pose with the foot on the ankle or calf.
- Pigeon Pose (can put a lot of twist/pressure on the hip)
- Any pose where you force the hip joint to turn beyond its comfortable range or the allowed limit.
H4 Other Risky Poses
- Inversions: Poses where your hips are higher than your heart (like Headstand, Shoulderstand) should be avoided or done with extreme caution and only when fully recovered and approved. They can be hard to control and increase fall risk.
- Fast Flowing Yoga (Vinyasa): Avoid styles of yoga that move quickly from one pose to another. It is harder to keep your hip safe when moving fast. Stick to slow, gentle styles at first.
- Balancing Poses Without Support: While balance is a benefit, trying hard balancing poses like Tree Pose or Warrior III without holding onto something increases the risk of falling, which is dangerous for your new hip.
Always remember your specific hip precautions. Some surgeons have different rules. Always check with your doctor and physical therapist.
Making Yoga Safe: Modifications Are Your Friends
Yoga modifications after hip replacement are ways to change a pose to make it safe for you. You will use modifications often.
H4 Using Props
- Chairs: Sit on a chair for seated poses or use it for support in standing poses.
- Blocks: Place a block under your hands in standing forward bends (if approved and done gently) or under your sitting bones in seated poses if sitting on the floor.
- Blankets: Fold blankets to sit on to raise your hips higher than your knees (making sitting cross-legged safer if allowed) or place under knees for padding.
- Straps: Use a strap to gently stretch legs without having to bend forward too much.
H4 Changing the Pose
- Lessen the Depth: Do not bend your hip as far in poses like seated forward bends or gentle knee-to-chest.
- Widen Your Stance: Keep your feet wider apart in standing poses to give your hips more space and stability.
- Avoid Crossing: In poses like seated twists, keep both feet on the floor instead of crossing one leg over the other.
- Keep Legs Parallel: In poses like Bridge or Gentle Backbends, keep your knees and feet pointing straight ahead, hip-width apart, not letting knees fall in or out.
- Shorten the Lever: If lifting a leg, keep the knee bent instead of straight to make it easier on the hip joint.
Always start with the simplest version of a pose. As you get stronger and your hip heals, you might be able to do a bit more, but never push into pain or past your hip precautions.
Hearing What Your Body Tells You
This might be the most important part of doing yoga safely after hip replacement. Your body will give you signals. You must listen to them.
- Pain is a Stop Sign: If a pose causes sharp pain in your hip or anywhere else, stop doing it right away. Mild discomfort or stretching sensation is okay, but pain is not.
- Feeling Unstable: If you feel shaky or unstable in a pose, use more support (like a wall or chair) or do a different pose.
- Clicking or Popping: If you hear or feel clicking or popping in your new hip during a pose, stop. Tell your doctor or therapist about it.
Yoga is not about pushing yourself to the limit or trying to do fancy poses. It is about moving in a way that helps your body heal and feel better. After hip surgery, this means being extra kind and careful with yourself.
Steps for a Safe Yoga Practice
Ready to try yoga? Here are some steps to follow for a safe return:
- Get the OK: Talk to your surgeon and physical therapist first. Make sure they say you are ready. Ask about your specific hip precautions and how long they last.
- Start with the Basics: Begin with very gentle yoga for hip replacement recovery, like chair yoga or simple lying-down stretches. Restorative yoga after hip replacement is a good option too.
- Find the Right Teacher: Look for a yoga teacher who has experience working with people who have had hip replacements or other injuries. Tell them about your surgery before class.
- Use Props: Do not be afraid to use chairs, blocks, blankets, or straps. They are there to help you be safe and comfortable.
- Modify Poses: Always change poses to fit your needs and hip precautions. Your physical therapist can show you how.
- Move Slowly: Go into and out of poses slowly and with control. Quick movements can be risky.
- Focus on Breath: Pay attention to your breath. It helps you stay calm and mindful of your body.
- Listen to Your Hip: If anything feels wrong, stop. Your hip is still healing and needs care.
- Do Not Compare: Do not worry about what others in a yoga class are doing. Focus only on what feels right and safe for your body.
- Be Patient: Getting back to yoga takes time. Celebrate small steps and do not get upset if you cannot do poses you used to do. Healing is a process.
Yoga and Physical Therapy: Working Together
Think of physical therapy and yoga for hip replacement as partners in your recovery.
Physical therapy often gives you the foundation. It helps you regain basic strength, movement, and teaches you how to move safely in daily life. It directly addresses the needs of your healing hip joint and surrounding muscles.
Yoga can build on this foundation. Once you have the strength and understanding from physical therapy, yoga can help you:
- Add more types of movement in a controlled way.
- Improve flexibility gently.
- Work on balance in different positions.
- Reduce stress and promote overall well-being.
Many physical therapy exercises look like simple yoga poses. Your therapist might even use yoga-like moves in your sessions. As you get better, your therapist can help you move from therapy exercises to modified yoga poses. It is a smooth path when they work together.
Deciphering Your Body’s Signals
As you practice yoga, you will learn more about how your new hip feels. This helps you know if yoga is safe after hip replacement surgery for you at any given time.
- Good Signals:
- Feeling a gentle stretch.
- Muscles feeling like they are working (lightly).
- Improved range of motion over time.
- Feeling more stable.
- Feeling calmer and more relaxed.
- Bad Signals (Stop Signs):
- Sharp pain.
- Sudden popping or clicking in the hip joint.
- Feeling like the hip might come out of place.
- Wobbling or losing balance to a degree that feels unsafe.
- Bruising or swelling increasing after practice.
It is better to do less and be safe than to push too hard and cause a problem.
The Long View: Yoga as Ongoing Care
Once you are well past the main recovery phase (maybe 6-12 months after surgery or later, depending on your doctor), you might be able to do more types of yoga. Some people can return to nearly all activities. Others might always need to avoid certain deep or twisted poses depending on their specific surgery type (like posterior vs. anterior approach) and how their hip feels.
Even years after surgery, continuing a mindful yoga practice can be a great way to keep your hip healthy, your muscles strong, and your body moving well. It can help prevent stiffness and keep the benefits you gained from surgery and physical therapy.
Always remember the basic rules:
* Stay within your hip’s safe range of motion.
* Avoid forceful movements.
* Listen to your body.
* If you are unsure about a pose, ask a qualified professional (physical therapist or experienced yoga teacher who understands hip replacements).
Summarizing Safe Practice
Doing yoga after a hip replacement is possible and can be very good for you. But it must be done with careful planning and respect for your healing hip.
- Timing is Key: Start only when your doctor and physical therapist say it is time. Follow the returning to yoga after hip surgery timeline they suggest.
- Learn the Rules: Know your hip precautions and avoid yoga poses to avoid after total hip replacement that break these rules.
- Start Simple: Begin with gentle yoga for hip replacement recovery and restorative yoga after hip replacement.
- Use Help: Work with a physical therapist and possibly a yoga teacher who knows about hip surgery. Use props and yoga modifications after hip replacement.
- Listen In: Pay close attention to what your body tells you during every pose.
By taking these steps, you can enjoy the many benefits of yoga post hip surgery while keeping your new hip safe for years to come.
Frequently Asked Questions (FAQ)
H4 How soon after hip replacement can I do yoga?
You usually start with physical therapy first. Most people can start trying very gentle, modified yoga poses (like chair yoga or simple lying-down moves) around 2-3 months after surgery, but only after getting approval from their surgeon and physical therapist.
H4 Are there any yoga poses I should never do after hip replacement?
Yes, generally you should avoid poses that involve deep hip bending (like deep squats or full knee-to-chest), crossing your legs past the middle of your body (like Eagle Pose), or extreme hip twisting (like Lotus Pose or deep Pigeon Pose), especially while you still have hip precautions. Check with your doctor about your specific limits.
H4 What type of yoga is best for hip replacement recovery?
Gentle yoga, chair yoga, and restorative yoga are usually the best types to start with. They focus on slow, safe movements and use props for support. Avoid fast-paced styles like Vinyasa or power yoga when you are starting out.
H4 Can yoga help with pain after hip replacement?
Yes, gentle yoga can help. It can reduce stiffness, improve blood flow, and strengthen supporting muscles, which can ease pain over time. The breathing and relaxation parts of yoga can also help manage pain and stress.
H4 Do I still need physical therapy if I want to do yoga?
Yes, physical therapy is very important first. It builds the necessary strength and teaches you safe movement patterns specific to your hip replacement. Yoga can be a good way to continue improving movement and flexibility after physical therapy, or in connection with it. Physical therapy and yoga for hip replacement work well together.
H4 How can I modify yoga poses after hip replacement?
You can modify poses by using props like chairs (for sitting or support), blocks (under hands or hips), or blankets. You can also change the pose itself, like not bending your hip as deeply, keeping your feet wider apart, or avoiding crossing your legs. Your physical therapist or a skilled yoga teacher can help you learn these modifications.
H4 What should I do if a yoga pose hurts my hip?
Stop the pose right away. Do not push through pain. Pain is your body telling you something is wrong. Rest, and if the pain continues, talk to your doctor or physical therapist. You may need to avoid that pose or find a different way to do it.
H4 Can I sit cross-legged in yoga after hip replacement?
Sitting cross-legged can be risky because it often involves deep hip bending and external rotation, and sometimes crossing legs past the midline, all of which can go against hip precautions. You might be able to sit cross-legged if you can do so with your knees much lower than your hips (using a tall cushion or block) and without straining, but it is often best to sit in a chair or with legs extended forward instead, especially early on. Always check your specific hip precautions and ask your doctor or therapist.