
Taking a picture of your computer screen, called a screenshot, is simple on a Lenovo Yoga laptop. You can capture the whole screen, just one window, or even a small part of it. This guide shows you the easy ways to do it using your keyboard and built-in Windows tools like the snipping tool Lenovo Yoga and Snip & Sketch Lenovo. We will also show you how to find your saved pictures in the screenshot folder Windows and what to do if your PrtSc key not working Lenovo.
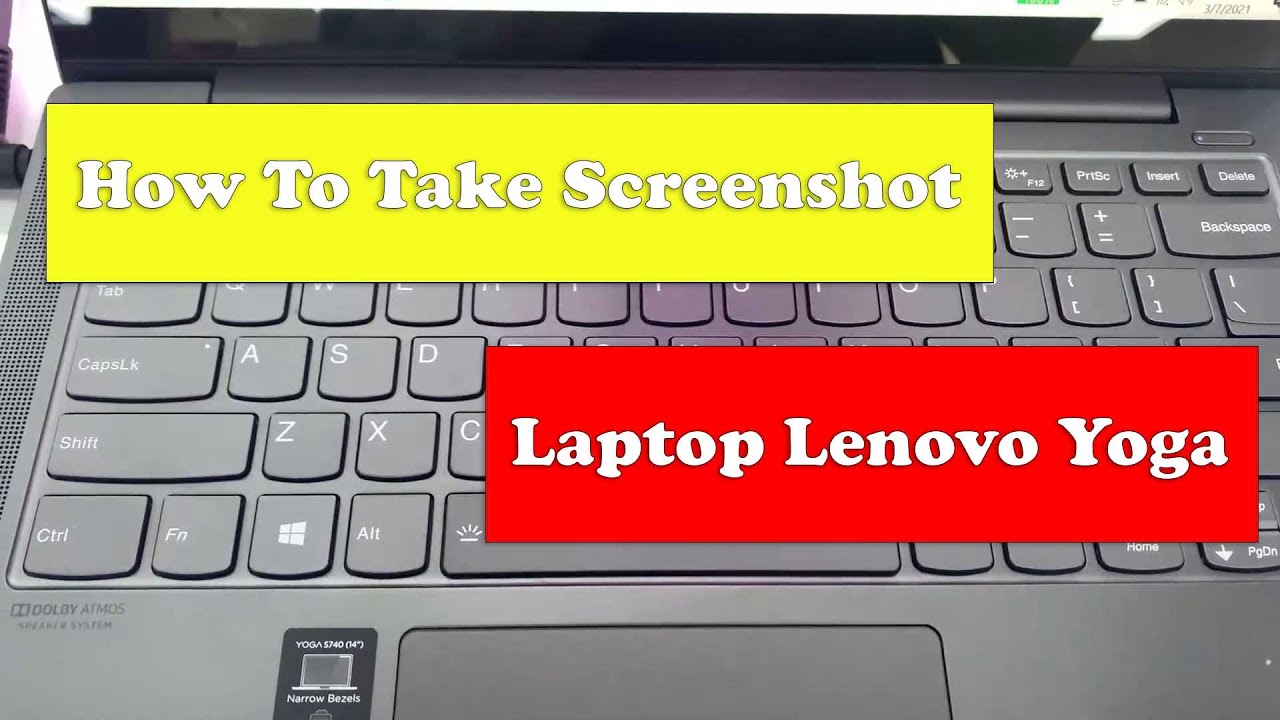
Image Source: i.ytimg.com
Finding Your Screenshot Keys
Lenovo Yoga laptops are known for being slim and flexible. Because of this, the keyboard might look a bit different from bigger laptops.
On most keyboards, there’s a key called “Print Screen.” This is often shortened to PrtSc, PrntScrn, or PrintSc.
Look for this key on the top row of your keyboard, usually near the F keys (F1, F2, etc.). It might share space with another key, meaning you might need to hold down the Fn key to use it. This is common on smaller laptops like some Yoga models. If your Lenovo Yoga Print Screen key has “PrtSc” written on it under another symbol or word, you will likely need the Fn key.
Method 1: Taking a Full Screen Picture (Copies to Clipboard)
This is a very basic way to capture your screen.
H4 What This Method Does
Pressing the PrtSc key alone takes a picture of everything you see on all your screens.
But, it does not save the picture as a file on your computer right away.
Instead, it copies the picture to a temporary spot called the clipboard. Think of the clipboard like a hidden holding area.
H4 Steps to Use PrtSc Key
- Get your screen ready. Show whatever you want to capture.
- Find the PrtSc key on your Lenovo Yoga keyboard.
- Press the PrtSc key.
- If
PrtScis the main function on the key (usually written bigger or on top), just press it. - If
PrtScis written smaller or below another symbol, you might need to hold down the Fn key while pressing PrtSc. This is often the case with Fn PrtSc Lenovo Yoga combinations.
- If
- You won’t see anything happen right away. The picture is now on the clipboard.
- To see and save the picture, you need to paste it somewhere.
H4 Pasting Your Screenshot
Since the picture is on the clipboard, you need to open an app where you can paste images. Good options are:
- Paint (comes with Windows)
- Paint 3D
- Word
- Email programs
- Image editing apps (like Photos, Photoshop, GIMP)
Let’s use Paint as an example, as every Windows computer has it.
- Open Paint. You can find it by typing “Paint” in the search bar next to the Start button.
- Once Paint is open, press
Ctrl+Von your keyboard. This is the paste command. - Your screenshot should appear in the Paint window.
H4 Saving Your Screenshot
After pasting the picture, you need to save screenshot location.
- In Paint (or the app you used), click on “File” in the top left corner.
- Click on “Save As.”
- Choose a place on your computer to save the picture. Your “Pictures” folder is a good spot.
- Give the file a name (like “My First Screenshot”).
- Choose a file type. JPEG or PNG are common choices. PNG is usually better for pictures with text or simple graphics. JPEG is good for photos.
- Click “Save.”
Now you have saved your screenshot as a file.
This method (just pressing PrtSc) is quick to capture but takes extra steps to save as a file.
Method 2: Taking a Full Screen Picture (Saves Automatically)
This method is faster if you want a file right away. It captures the whole screen and saves it automatically.
H4 What This Method Does
Pressing the Windows key + PrtSc takes a picture of your full screen, just like the first method.
But, instead of just putting it on the clipboard, Windows automatically saves it as a picture file.
H4 Steps to Use Windows Key + PrtSc
- Set up your screen with what you want to capture.
- Find the
Windows keyon your keyboard. It’s usually in the bottom row, betweenFnandAlt. It has the Windows logo on it. - Find the PrtSc key.
- Hold down the
Windows keyand press the PrtSc key at the same time.- If you need the
Fnkey for PrtSc, you might need to pressWindows key+Fn+ PrtSc. This can be a bit tricky with three keys! TryWindows key+PrtScfirst, as many Lenovo Yoga models don’t requireFnfor this specific shortcut.
- If you need the
- Your screen might dim or flash for a moment. This shows that the screenshot was taken successfully.
H4 Finding Your Saved Screenshots
The great thing about this method is that Windows saves the file for you automatically.
It puts the pictures in a specific spot. This is the default screenshot folder Windows.
To find it:
- Open File Explorer. You can do this by clicking the folder icon on your taskbar or by pressing
Windows key+E. - In File Explorer, look on the left side. Click on “Pictures.”
- Inside the “Pictures” folder, you should see another folder called “Screenshots.” Click on that.
- All the screenshots you took using
Windows key+ PrtSc will be in this “Screenshots” folder. - The file names will be things like “Screenshot (1).png”, “Screenshot (2).png”, and so on.
This is the easiest way to get a screenshot saved as a file quickly.
Method 3: Taking a Picture of Just One Window
Sometimes you only want a picture of one specific program window you have open, not your whole screen.
H4 What This Method Does
Pressing Alt + PrtSc captures only the window that is currently active or selected.
Like the first method (PrtSc alone), this picture is copied to the clipboard. It is not saved as a file automatically.
H4 Steps to Use Alt + PrtSc
- Open the program or window you want to capture.
- Click on the title bar of that window (the very top part with the name of the program). This makes sure the window is “active.”
- Find the
Altkey (usually next to the spacebar) and the PrtSc key. - Hold down the
Altkey and press the PrtSc key.- Again, if your PrtSc key requires the
Fnkey, you might need to pressAlt+Fn+ PrtSc.
- Again, if your PrtSc key requires the
- The picture of just that active window is now on the clipboard.
H4 Saving the Window Screenshot
Just like the first method, you need to paste the picture into an app to see and save it.
- Open an app like Paint, Word, or an email program.
- Press
Ctrl+Vto paste the image from the clipboard. - Only the window you had active will appear.
- Use the “Save As” option in the app to save screenshot location and name the file.
This method is great for focusing on one program without showing everything else on your desktop.
Method 4: Using Snip & Sketch for More Control
Windows has a helpful tool designed just for taking screenshots. It’s called Snip & Sketch now, replacing the older Snipping Tool. This is your go-to for taking a partial screenshot Lenovo laptop.
H4 Accessing Snip & Sketch
There are a few ways to open this tool:
- Search: Click the search icon or bar next to the Start button. Type “Snip & Sketch” and click on the app when it appears.
- Keyboard Shortcut: Press the
Windows key+Shift+Sall at the same time. This is a very quick way to start a snip. - Action Center: Click the Action Center icon (it looks like a speech bubble) on the right side of your taskbar. Click “Expand” if needed, then click the “Screen snip” button.
Using the Windows key + Shift + S shortcut is often the fastest way to use Snip & Sketch Lenovo. When you press these keys, your screen will dim and a small toolbar will appear at the top.
H4 Using the Snip & Sketch Toolbar
When the toolbar appears at the top of your screen after pressing Windows key + Shift + S, you will see icons for different types of snips (screenshots):
- Rectangular Snip: This is the first icon (looks like a square). It lets you draw a box around the area you want to capture.
- Freeform Snip: The second icon (looks like a wavy shape). This lets you draw any shape you want around the area you want to capture. This is useful for oddly shaped areas.
- Window Snip: The third icon (looks like a window). This lets you click on any open window to capture just that window, like the
Alt+ PrtSc method, but it opens in Snip & Sketch for editing. - Fullscreen Snip: The fourth icon (looks like a monitor). This captures your entire screen, like the
Windows key+ PrtSc method, but also opens in Snip & Sketch.
H4 Taking a Partial Screenshot
The Rectangular and Freeform snip tools are perfect for taking a partial screenshot Lenovo laptop.
- Press
Windows key+Shift+S. Your screen dims. - Click on the Rectangular or Freeform snip icon on the top toolbar.
- For Rectangular: Click and drag your mouse from one corner to the opposite corner of the area you want to capture. Let go of the mouse button when done.
- For Freeform: Click and hold your mouse button, then draw a shape around the area you want. Release the mouse button to finish.
- The area you selected will be captured.
H4 Working with the Snip in Snip & Sketch
After you take a snip using Windows key + Shift + S, two things happen:
- The picture is automatically copied to your clipboard. So you can paste it (
Ctrl+V) into an app right away. This covers the copy screenshot to clipboard function within Snip & Sketch. - A small preview notification pops up in the bottom right corner of your screen. Click on this notification.
Clicking the notification opens the Snip & Sketch app window with your screenshot loaded.
H4 Editing and Saving in Snip & Sketch
The Snip & Sketch window has simple tools:
- Pen, Pencil, Highlighter: You can draw or write on your screenshot.
- Eraser: To remove marks you made.
- Ruler/Protractor: For drawing straight lines or measuring angles.
- Crop: To cut out parts of the picture.
After making any edits:
- Click the Save icon (it looks like a floppy disk) in the top right corner.
- Choose where you want to save screenshot location.
- Give the file a name.
- Choose the file type (PNG, JPG, GIF).
- Click “Save.”
You can also click the Copy icon (two overlapping papers) in the top right to copy the edited image back to the clipboard, or the Share icon to send it using nearby share, email, etc.
Snip & Sketch is very flexible and ideal for taking specific parts of the screen or doing quick edits. It effectively replaces the older snipping tool Lenovo Yoga that was in previous Windows versions, though you might still find the old one by searching “Snipping Tool.”
When Your PrtSc Key Doesn’t Work
Sometimes you press the PrtSc key on your Lenovo Yoga, and nothing seems to happen, or it doesn’t work the way you expect. This is the PrtSc key not working Lenovo issue.
H4 Possible Reasons and Solutions
- You need the Fn Key: On many Lenovo Yoga models, the PrtSc function is combined with another key. You have to hold down the
Fnkey while pressing PrtSc. Try pressingFn+ PrtSc. - Fn Lock is On: Some Lenovo keyboards have an
Fn Lock. This changes how the F keys and keys like PrtSc work. IfFn Lockis on, pressing PrtSc might use the secondary function printed on the key without needingFn. If it’s off, you do needFnfor the secondary function like PrtSc.- Look for an
Fn Lockkey (sometimes combined withEsc). PressingFn+Escoften togglesFn Lockon or off. Try pressingFn+Esc, then try just PrtSc orFn+ PrtSc again. - Check if there is a light on the
Fn Lockkey or theFnkey itself indicating its state.
- Look for an
- Saving vs. Clipboard: Remember that just pressing PrtSc usually only copies to the clipboard. If you’re looking for a saved file, you need to use
Windows key+ PrtSc (which saves automatically) or paste the clipboard image into an app and save it yourself. If you expected a file but only pressed PrtSc, it did work, but the picture is just waiting on the clipboard. - Software Running: Sometimes, other programs running on your computer might interfere with the PrtSc key. Some cloud storage apps (like OneDrive or Dropbox) or gaming software (like Steam or Geforce Experience) have their own screenshot features that might take over the PrtSc key.
- Check the settings of these programs to see if they are set to use the PrtSc key. You might need to change their settings or temporarily close them to use the standard Windows screenshot functions.
- Keyboard Driver Issue: The software that helps your keyboard communicate with Windows might have a problem.
- You can try updating your keyboard drivers. Search for “Device Manager” in the Windows search bar and open it. Expand “Keyboards,” right-click on your keyboard, and select “Update driver.” You can also visit the Lenovo support website for your specific Yoga model and download the latest drivers there.
- Restarting your laptop can sometimes fix temporary driver glitches.
- Physical Keyboard Problem: In rare cases, the PrtSc key itself might be broken.
- Test if the key feels different from others. If other keys around it work fine, but PrtSc does not, it might be a hardware problem.
- If the key is physically stuck or damaged, you might need to contact Lenovo support or use the alternative screenshot methods (
Windows key+Shift+Sis a good one as it doesn’t rely only on the PrtSc key).
If your PrtSc key not working Lenovo, don’t worry. You still have other easy ways to take screenshots using the built-in Windows tools or other Lenovo Yoga keyboard shortcuts.
Other Lenovo Yoga Keyboard Shortcuts for Screenshots
Here is a quick list of the main shortcuts we’ve discussed for taking screenshots on your Lenovo Yoga:
- PrtSc (or
Fn+ PrtSc): Captures full screen to clipboard. - Windows key + PrtSc (or Windows key +
Fn+ PrtSc): Captures full screen and saves as a file in the Screenshots folder. Alt+ PrtSc (orAlt+Fn+ PrtSc): Captures the active window to clipboard.- Windows key +
Shift+S: Opens the Snip & Sketch toolbar for rectangular, freeform, window, or fullscreen snips. Copies the snip to the clipboard and shows a notification to open it in the app.
These Lenovo Yoga keyboard shortcuts give you fast ways to capture your screen depending on what you need.
Finding Your Saved Screenshots Later
We talked about the default screenshot folder Windows. It’s usually located at:
This PC > Pictures > Screenshots
But what if you saved screenshots using the methods that copy to the clipboard, and you saved them manually from Paint or another app?
In that case, the save screenshot location depends on where you chose to save the file when you used “Save As.”
To find those files:
- Try to remember where you saved them (like your Desktop, Documents, or a specific folder).
- Open File Explorer (
Windows key+E). - Go to the folder you think you saved it in.
- If you remember the file name you gave it, you can type that name into the search bar at the top right of the File Explorer window in that folder or in “This PC” to search everywhere.
- You can also search for the file type, like
.pngor.jpg, but this will show all image files of that type on your computer, which might be a lot!
It’s a good idea to create a specific folder just for your screenshots if you plan to take many, and always save them there. This helps keep your files organized.
Comprehending Clipboard vs. Saved File
It is helpful to understand the difference between a screenshot going to the clipboard and one being saved as a file.
| Feature | Copies to Clipboard (PrtSc, Alt + PrtSc, Win + Shift + S) |
Saves as a File (Win + PrtSc) |
|---|---|---|
| What it is | A temporary copy held in your computer’s memory. | A permanent picture file (.png, .jpg) stored on your hard drive. |
| How to see it | Must be pasted (Ctrl + V) into an image-friendly program (Paint, Word, etc.). |
Found directly in File Explorer in its save location (like the Screenshots folder). |
| How to share | Paste into an email, chat window, or document. | Attach the file to an email, upload it online, copy the file itself. |
| Is it permanent? | No. It is replaced when you copy something else, or lost if you turn off the computer. | Yes. Stays until you delete the file. |
Methods that use the clipboard require an extra step (pasting and saving) to get a permanent file, unless you paste it directly into something you are saving anyway (like a document or email). Methods that save automatically are faster for getting a file, but don’t give you the chance to edit before saving unless you open the file later.
Snip & Sketch (Windows key + Shift + S) offers the best of both worlds: it copies to the clipboard and gives you the option to open in the app for editing and saving as a file.
Grasping Different Screenshot Types
You can take different types of screenshots depending on what you need to show.
- Full Screen: Shows everything on all your monitors. Useful for showing your entire desktop setup or if the important info is spread across the screen.
- Active Window: Shows only the program window you are currently using. Good for showing how a specific app looks or works without revealing other things you have open.
- Partial Area: Shows only a box or shape you draw on the screen. Best for capturing just a small part of the screen, like a specific error message, a picture on a webpage, or a part of a document. This is where partial screenshot Lenovo laptop techniques using Snip & Sketch shine.
Knowing these options helps you choose the right method and Lenovo Yoga keyboard shortcuts for the task.
Tips for Taking Good Screenshots
- Close Unneeded Windows: If you are taking a full screen or active window shot, close or minimize other windows you don’t want to appear in the picture.
- Hide Sensitive Info: Make sure no personal or private information (like email addresses, passwords, or confidential documents) is visible in the area you are capturing, especially for full screen shots. Use Snip & Sketch’s crop tool or the partial screenshot method to avoid capturing sensitive areas.
- Make Sure Content Fits: If you need to capture a long webpage or document, you might need to scroll and take multiple screenshots, or use a special browser extension designed for capturing entire scrolling pages. Standard Windows tools usually only capture what is currently visible on the screen.
- Highlight or Annotate: If you need to point something out in your screenshot, use the tools in Snip & Sketch or Paint to draw arrows, circles, or add text after taking the picture.
Troubleshooting More Screenshot Issues
H4 Screenshot is Blank or Black
Sometimes you take a screenshot, but when you paste or open it, it’s just a black or blank box.
- Playing Video or Protected Content: Digital Rights Management (DRM) on videos (like movies playing in certain apps or browsers) can prevent screenshots. The screen might go black in the area where the video is playing. There’s often no easy way around this with standard screenshot tools due to copyright protection.
- Running Specific Software: Some security software or corporate applications might block screenshots for protection.
- Hardware Acceleration: Sometimes, issues with your graphics card or its settings can cause this. Ensuring your graphics drivers are updated can help.
- Using Remote Desktop: Taking a screenshot of a remote session might behave differently depending on the software used.
H4 Screenshot Saves to the Wrong Place
If you are using Windows key + PrtSc, it should always save to the default screenshot folder Windows (Pictures\Screenshots).
- If it is not going there, check if the “Screenshots” folder was moved or deleted. You can right-click on the “Pictures” folder, go to Properties, then the “Location” tab, and make sure the path is correct or restore the default location.
- If you are manually saving from Paint or Snip & Sketch, the save screenshot location is wherever you chose last, or the default save location for that specific app. Always double-check the folder shown in the “Save As” window before clicking save.
H4 Screenshots are Not Clear or are the Wrong Size
The standard screenshot methods capture exactly what is shown on your screen at its current resolution.
- If the text or images in the screenshot are blurry, they were likely blurry on your screen too. Check your display settings.
- If you are pasting into a document and it appears too big or too small, you can usually resize the image within the document program (like Word).
- Snip & Sketch allows you to crop the image to make it smaller or focus on a specific area.
H4 PrtSc Key Seems Stuck or Repeats
If the PrtSc key not working Lenovo involves it acting like it is constantly pressed or repeating, this could be a hardware issue or a problem with the keyboard driver.
- Try cleaning around the key gently.
- Restart your laptop.
- Check for driver updates in Device Manager.
- If the problem persists, especially if other keys are affected, it might indicate a keyboard hardware failure.
Using the Lenovo Yoga keyboard shortcuts for screenshots is usually very reliable once you know which keys to press and whether you need the Fn key.
FAQ: Common Questions About Lenovo Yoga Screenshots
H5 Where do screenshots go on a Lenovo Yoga?
If you use the Windows key + PrtSc shortcut, screenshots are saved automatically as files in the default screenshot folder Windows. This folder is usually found at Pictures > Screenshots in File Explorer. If you use just the PrtSc key, Alt + PrtSc, or Windows key + Shift + S, the screenshot is copied to the clipboard first. You need to paste it into an app (like Paint) and save it yourself to create a file in a save screenshot location you choose.
H5 How do I take a partial screenshot on my Lenovo Yoga?
The best way to take a partial screenshot Lenovo laptop is by using the Snip & Sketch tool. Press Windows key + Shift + S. Your screen will dim, and a toolbar will appear. Choose the Rectangular or Freeform snip tool, then click and drag your mouse to select the area you want to capture. The selected area will be copied to your clipboard.
H5 Why is my PrtSc key not working on my Lenovo Yoga?
Reasons for the PrtSc key not working Lenovo include needing to press the Fn key along with PrtSc (Fn PrtSc Lenovo Yoga), the Fn Lock being enabled or disabled unexpectedly, other software taking over the key, outdated keyboard drivers, or a physical problem with the key itself. Try using Fn + PrtSc or check your Fn Lock key. If it still doesn’t work, use alternative methods like Windows key + Shift + S.
H5 How do I save a screenshot from the clipboard?
When a screenshot is on the clipboard (copy screenshot to clipboard), it’s not a file yet. To save it, open an app that works with images, like Paint (type “Paint” in Windows search). Press Ctrl + V to paste the screenshot into the app. Then, go to “File” > “Save As,” choose a folder (your save screenshot location), give it a name, select a file type (like .png or .jpg), and click “Save.”
H5 What is the difference between Snipping Tool and Snip & Sketch?
Snip & Sketch Lenovo is the newer tool in Windows that is replacing the older snipping tool Lenovo Yoga. Snip & Sketch can be accessed quickly with Windows key + Shift + S and offers slightly improved editing tools and functionality compared to the older Snipping Tool. Both allow for capturing parts of the screen (partial screenshot Lenovo laptop).
H5 How do I use the Fn key for screenshots on my Lenovo Yoga?
Look at your PrtSc key. If “PrtSc” is written as a secondary function (often smaller text or a different color), you need to hold down the Fn key while pressing PrtSc. This is the Fn PrtSc Lenovo Yoga combination. The Fn key activates the secondary functions on certain keys. Sometimes, pressing Fn + Esc toggles Fn Lock, which can change if you need the Fn key or not.
Final Thoughts
Taking screenshots on your Lenovo Yoga laptop is easy once you know the different options available. Whether you prefer the quick save method using Windows key + PrtSc to the screenshot folder Windows, capturing just one window with Alt + PrtSc, or taking a partial screenshot Lenovo laptop using the flexible Snip & Sketch Lenovo tool with Windows key + Shift + S, there’s a method that fits your needs.
Remember your Lenovo Yoga keyboard shortcuts, be mindful if you need to use the Fn PrtSc Lenovo Yoga combination, and know where to find your pictures using the default save screenshot location or the screenshot folder Windows. If your PrtSc key not working Lenovo, try the Fn key or switch to Snip & Sketch. With these simple steps, you can easily capture anything you need on your screen.