
Let’s learn how to turn on your Lenovo Yoga laptop. To start your Lenovo Yoga laptop, you just need to find the power button and press it. If your Lenovo Yoga won’t turn on, or if you see a Lenovo Yoga screen black won’t turn on, it means something is not right, and you need to check a few things. We will look at simple steps to turn it on and what to do if it does not work.
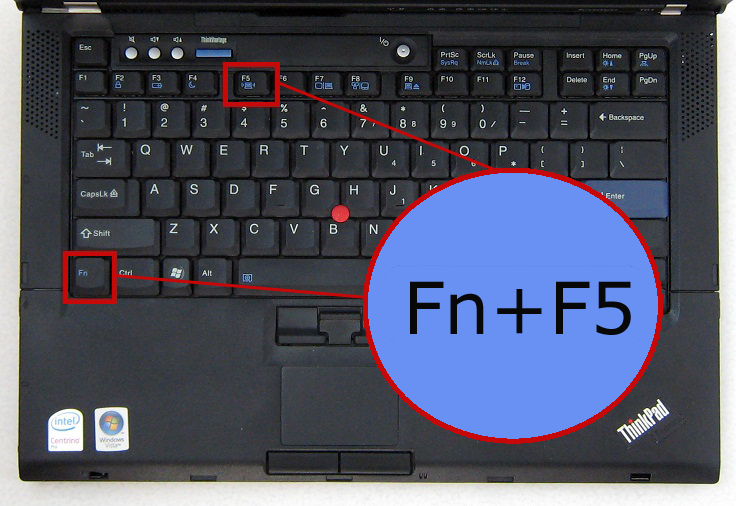
Image Source: ccit.college.columbia.edu
Locating the Power Button
First things first: you need to find the button that turns your computer on. This is called the Lenovo Yoga power button location. It can be in different spots depending on which Lenovo Yoga model you have.
Where is the Power Button?
Lenovo makes many Yoga models. The button can be in a few main places.
On the Side
Some models have the power button on the side. Look at the edges of your laptop. It might be on the right side. It could be on the left side.
- Check the right edge.
- Check the left edge.
- Look for a small, round button.
- Or look for a button with a small power symbol. The symbol is a circle with a line inside, pointing up.
Near the Keyboard
Other Lenovo Yoga models have the power button on the keyboard area.
- Look above the keyboard.
- It might be in one of the corners.
- It could be in the top right corner.
- It could be near the function keys (like F1, F2, etc.).
- Again, look for the round button.
- Or look for the power symbol.
Integrated with the Keyboard
On some newer models, the power button might look like a regular key. It will be part of the keyboard layout.
- Check the top row of keys.
- It is often the last key on the right.
- It will have the power symbol on it.
Finding the Lenovo Yoga power button location is step one. Take a moment to look carefully at your laptop. Check all sides and the area around the keyboard.
The Standard Power On Sequence
Now that you found the button, let’s do the basic steps. This is the normal Lenovo Yoga power on sequence.
Simple Steps to Start
This is how to start Lenovo Yoga laptop the easy way.
Step 1: Find the Button
We just did this. Locate the power button on your laptop.
Step 2: Press the Button
Put your finger on the power button. Push it down gently. You do not need to push it hard. Just a normal press.
Step 3: Wait a Moment
After you press it, wait a second or two. The laptop should start. You should see lights turn on. You might hear a small sound. The screen should light up.
Step 4: Watch for Signs of Life
Look for signs that the computer is waking up.
- Do you see lights turn on?
- Does the screen show anything?
- Do you hear the fan start?
If you see these signs, your Lenovo Yoga is starting up. Great!
Grasping Power and Charging
For your Lenovo Yoga to turn on, it needs power. It gets power from the battery or from being plugged into the wall.
Checking Power Connection
Is your laptop plugged in? This is a simple check.
Connect the Charger
Get the charger cable. One end goes into a special port on your laptop. The other end goes into a wall outlet.
- Find the charging port on your laptop. It might be round or rectangle (USB-C).
- Plug the small end into the laptop port. Make sure it fits well.
- Plug the bigger end into a wall outlet. Make sure the outlet works. You can test the outlet with a lamp or phone charger.
Check the Charger
Look at the charger itself.
- Is the cable damaged?
- Is the part that plugs into the wall okay?
- Sometimes, the charger has a small light. Does that light turn on when you plug it in?
If the charger is broken, your laptop will not get power.
The Lenovo Yoga Charging Indicator
Many Lenovo Yoga laptops have a light that shows if it is charging. This is the Lenovo Yoga charging indicator.
Finding the Charging Light
The charging light is usually near the charging port. Or it could be on the front edge of the laptop.
- Look near where you plug in the charger cable.
- Look on the front edge or side edges.
- It is usually a small LED light.
What the Charging Light Tells You
The color or state of this light tells you about the battery and charging.
- Solid White or Green: The battery is full or almost full. The laptop is plugged in.
- Solid Orange or Amber: The battery is charging. It is not full yet.
- Blinking Orange or Amber: The battery is very low. It needs power right away. Or there could be a charging problem.
- Off: The laptop is not plugged in. Or it is plugged in, but the battery is full and it is not actively charging. Or there is a problem.
Checking the Lenovo Yoga charging indicator is important. If it shows the laptop is charging, that is a good sign it is getting power.
The Lenovo Yoga Power Light Status
Besides the charging light, there is often a power light. This light tells you if the laptop is on or in a sleep state. This is the Lenovo Yoga power light status.
Where to See the Power Light
The power light might be part of the power button itself. Or it might be near it. Or it could be on the front edge of the laptop.
- Check the power button. Does it light up when you press it?
- Look near the power button.
- Look on the front edge of the laptop.
What the Power Light Means
The power light tells you the state of the laptop’s power.
| Light State | What it Means |
|---|---|
| Off | Laptop is fully off or has no power. |
| Solid White | Laptop is on and working normally. |
| Solid Amber | Laptop is in sleep mode. |
| Blinking White | Laptop is in sleep mode. |
| Blinking Amber | Laptop is in sleep mode (low battery). |
If you press the power button and the power light turns on, even if the screen is black, it means the laptop tried to start. This helps figure out the problem.
What To Do If It Won’t Turn On
Sometimes, you press the button, but nothing happens. Your Lenovo Yoga won’t turn on. This can be frustrating. Let’s go through steps to fix it. These are common Lenovo Yoga startup problems.
Step 1: Check the Power Source
First, make sure the laptop is getting power.
Is It Plugged In?
- Make sure the charger is plugged into the laptop.
- Make sure the charger is plugged into a wall outlet.
- Check the wall outlet. Is it working? Try plugging something else into it.
Check the Charger and Cable
- Look at the charger cable. Is it broken? Are there cuts?
- Look at the part that plugs into the wall. Is it damaged?
- If your charger has a light, does it turn on when plugged into the wall? If not, the charger might be bad.
Check the Charging Indicator Light
- Plug the charger into the laptop.
- Look at the Lenovo Yoga charging indicator. What color is it? Is it on?
- If the light is off, even when plugged in, the laptop might not be getting power. This could mean a bad cable, bad charger, or a problem with the laptop’s charging port.
Step 2: Try a Hard Reset (Power Drain)
Sometimes, a simple reset can fix problems. This clears out temporary power issues.
Disconnect Power
- Unplug the charger from the laptop.
- If your laptop has a removable battery (most Yoga models do not), take it out.
Drain Residual Power
- With the charger unplugged and battery out (if possible), press and hold the power button.
- Hold the power button for 15 to 20 seconds. This helps drain any power left in the computer’s parts.
- Release the power button.
Reconnect Power and Try Again
- Plug the charger back into the laptop.
- Do not put the battery back in yet, if you took it out.
- Now, press the power button normally. Just a quick press.
- See if the laptop starts.
If it starts with just the charger, the battery might have an issue. If it still does not start, move to the next step.
Step 3: Check the Screen (If Lights Are On)
Sometimes the laptop turns on, but the screen stays black. This is a Lenovo Yoga screen black won’t turn on problem.
Look at the Power Light Status
- Did you press the power button?
- Does the Lenovo Yoga power light status show it is on (solid white)?
- If the power light is on, but the screen is dark, the issue might be with the screen itself, not the power.
Connect to an External Monitor
If you have a monitor or TV with an HDMI port, you can test if the laptop is working but just not showing on its screen.
- Find the HDMI port on your Lenovo Yoga.
- Get an HDMI cable.
- Plug one end into the laptop’s HDMI port.
- Plug the other end into the monitor or TV’s HDMI port.
- Turn on the monitor or TV. Select the correct HDMI input.
- Now, try turning on your Lenovo Yoga laptop again.
- Does the screen show up on the external monitor?
If you see the display on the external monitor, it means your laptop is starting, but its own screen is not working. This needs repair.
If you do not see anything on the external monitor either, the problem is likely deeper than just the screen.
Step 4: Check for Simple Hardware Issues
Look and listen for anything unusual.
Listen for Sounds
- Do you hear the fan running?
- Do you hear beeping sounds? Beeps can be error codes.
- Do you hear the hard drive spinning?
Feel the Laptop
- Does it feel warm when you try to turn it on? If it gets warm, parts inside are getting power.
Look for Damage
- Did you drop the laptop?
- Did you spill liquid on it?
- Are there any broken parts?
Physical damage can cause startup problems.
Step 5: What About Specific Models?
The steps are mostly the same for all models. But some models might have small differences. For example, the process for a Lenovo Yoga 7i won’t turn on is generally the same as other Yoga models. You still check power, try a hard reset, and check the screen. The location of the power button might be different, but the basic steps are universal.
Lenovo Yoga 7i Won’t Turn On
If your specific model, like a Lenovo Yoga 7i won’t turn on, follow these steps:
- Check Power: Make sure the USB-C charger is working and plugged into the correct USB-C port (some ports are just for data). Look for the charging light.
- Hard Reset: Unplug the charger. Press and hold the power button for 15-20 seconds. Plug the charger back in. Press the power button.
- External Screen: If the power light is on, try connecting to an external monitor via HDMI or a USB-C adapter.
- Check the Power Button: Ensure the power button feels normal when pressed.
These steps apply broadly.
Step 6: Check Battery Status and Health
A very low or bad battery can stop the laptop from starting.
Leave it Plugged In
- Plug the laptop in with the charger you know is working.
- Leave it plugged in for at least 30 minutes, maybe even an hour.
- The battery might be totally empty. It needs time to get enough charge to start the computer.
- Watch the Lenovo Yoga charging indicator. Does it turn on after some time? Does it change color?
Try Starting After Charging
After leaving it plugged in, try pressing the power button again.
- Just press it normally.
- Does it start now?
If it only starts after being plugged in for a long time, the battery might not hold a charge well anymore.
Interpreting Power Light Statuses
Let’s look closer at the power light. The Lenovo Yoga power light status can tell you a lot.
Detailed Light Meanings
The light might be on the power button, near it, or on the front of the laptop. Its state is key.
| Light Status | What it Means | What to Do |
|---|---|---|
| Off | Laptop is fully shut down. Or no power. | Press power button. Check power cord and outlet. Try a hard reset. |
| Solid White | Laptop is on and running. | Good! If screen is black, check display cable/settings or try external monitor. |
| Blinking White | Laptop is in sleep mode. | Press any key or the power button briefly to wake it up. |
| Solid Amber/Orange | Laptop is in sleep mode or low power state. | Press any key or power button briefly. Check battery charge level. |
| Blinking Amber/Orange | Laptop is in sleep mode with very low battery. | Plug in the charger immediately. Let it charge for a while then try starting. |
| Fast Blinking | Could indicate a system error or problem. | Try a hard reset (hold power button 15-20 secs with charger unplugged). Check online for specific beep/blink codes for your model. |
Knowing the Lenovo Yoga power light status helps you guess the problem. If it is solid white but no screen, the problem is not power. If it is off even when plugged in, the problem is power or the main board.
Deciphering Startup Problems
If the simple steps did not work, we need to look at other common Lenovo Yoga startup problems.
Problem: Press Power, Nothing Happens
No Lights, No Sounds
- Possible Cause: No power is reaching the laptop.
- Checks:
- Is the charger working? Test the outlet. Test the charger on another device if possible.
- Is the charger cable good?
- Is the charging port on the laptop damaged?
- Did the hard reset (power drain) work?
- Fixes: Try a known good charger. Try a different outlet. If still no sign of life, the main board might have an issue.
Problem: Power Light On, Screen Black
Lights are On, But Screen is Dark (Lenovo Yoga screen black won’t turn on)
- Possible Cause: The laptop is starting, but the display is not working.
- Checks:
- Is the power light solid white?
- Did you try connecting to an external monitor? Did it show anything?
- Is the screen brightness turned all the way down? (Use F keys like F5, F6 to turn brightness up).
- Did you accidentally turn off the screen? (Some keys can toggle the display).
- Fixes: Try connecting to an external monitor. If that works, the laptop screen likely needs repair. If not, the problem is deeper, possibly graphics chip or main board. Try forcing a shutdown (hold power button 10 seconds) and restarting.
Problem: Laptop Turns On, Then Turns Off
Starts Briefly, Then Shuts Down
- Possible Cause: Overheating, hardware failure, or serious system error.
- Checks:
- Does it feel very hot?
- Does it make strange noises?
- Did this happen after a fall or spill?
- Fixes: Ensure vents are clear (not blocked by blankets). If it overheats quickly, it needs cleaning or repair. If it shuts down without overheating, it could be a serious hardware issue requiring service.
Problem: Beeping Sounds on Startup
Hear Beeps Instead of Starting
- Possible Cause: BIOS/UEFI error codes. These beeps tell you something is wrong with the hardware.
- Checks:
- How many beeps are there? Is it a pattern (like 1 long, 2 short)?
- Fixes: You need to look up the specific beep code pattern for your exact Lenovo Yoga model. Search online for “[Your Lenovo Yoga Model] beep codes”. This will point you to the likely failing part (e.g., RAM, main board). This usually requires professional help.
Performing Initial Setup
Once your Lenovo Yoga laptop turns on, especially if it is new, you will go through the Lenovo Yoga initial setup.
What Happens During Setup
This process gets your laptop ready to use.
Windows Setup
- You will see a welcome screen from Microsoft Windows.
- You need to choose your language and country.
- You will connect to your Wi-Fi network.
- You will agree to terms and conditions.
- You will set up a user account and password or PIN.
- You might be asked about privacy settings.
Lenovo Software
- Lenovo might install its own helpful programs or updates.
- You might be asked to register your product.
Steps for First Time Use
1. Follow On-Screen Prompts
Just read what the screen says. It guides you through each step.
2. Connect to Internet
You will need Wi-Fi to complete setup and get updates. Find your network name and enter the password.
3. Create Your Account
Make a user name and password. This protects your computer. You can often use a Microsoft account.
4. Wait for Updates
The laptop will likely download and install updates. This can take some time. Be patient.
5. Get Started!
After setup and updates, you will see the desktop. Your Lenovo Yoga is ready to use.
Advanced Troubleshooting Steps
If the basic steps did not fix your Lenovo Yoga startup problems, you might need more advanced actions.
Using Recovery Options
Lenovo laptops have built-in recovery tools. These can help fix startup issues that are caused by software problems.
Accessing Recovery
- Turn off the laptop completely. If it is on, hold the power button for 10 seconds until it shuts down.
- Lenovo laptops often have a small button called the “Novo button”. It is usually a very small button, sometimes looks like a pinhole. It might be on the side.
- Find the Novo button location for your model online if you cannot see it.
- With the laptop off, press the Novo button using a paperclip or pin. Do not push too hard.
- This should bring up the “Novo Button Menu”.
The Novo Button Menu
This menu gives you options to fix or restore your system.
- Normal Startup: Try starting normally.
- BIOS Setup: Goes into the computer’s basic settings. Only change things here if you know what you are doing.
- Boot Menu: Lets you choose where to start from (like a USB drive).
- System Recovery: This is the option for fixing problems. Select this.
System Recovery Options
Inside System Recovery, you have choices:
- Startup Repair: Windows tries to fix problems that stop it from starting. This is a safe first step.
- System Restore: Go back to a previous point in time when the laptop worked fine. This will remove programs you installed since that time, but keeps your files.
- Reset this PC: Reinstalls Windows. You can choose to keep your files or remove everything. This is a more drastic step and should be done if other fixes fail.
Using the Novo button and System Recovery can fix many software-related startup issues.
Reseating Components
This step is for advanced users and can void your warranty if done wrong. If you are not comfortable, seek professional help.
Sometimes, parts inside the laptop can become loose.
Check RAM and Storage
- If you are comfortable opening your laptop (check guides for your specific model), you might be able to check the RAM sticks and the storage drive (SSD or HDD).
- Unplug the laptop, do a hard reset.
- Open the back cover carefully.
- Find the RAM sticks. Gently press them down to make sure they are seated fully in their slots.
- Find the storage drive. Make sure its connection is firm.
- Close the cover.
- Try starting the laptop again.
Loose RAM is a common cause of a laptop turning on (lights, fans) but showing a black screen.
Seeking Professional Help
If you have tried all the steps and your Lenovo Yoga still won’t turn on, it is likely a hardware problem that you cannot fix yourself.
- Contact Lenovo Support: Check if your laptop is still under warranty. Contact Lenovo’s support. They can guide you or arrange for repair.
- Visit a Repair Shop: Take your laptop to a trusted computer repair store. They have tools and knowledge to diagnose and fix hardware issues like main board problems or component failures.
Keeping Your Lenovo Yoga Healthy
Once you get your laptop working, here are tips to prevent future startup problems.
Power Management
- Use the official Lenovo charger.
- Avoid letting the battery completely drain often.
- Keep the laptop plugged in when possible, but it is also okay to use it on battery. Lenovo has features to manage battery health.
- Avoid extreme temperatures (very hot or very cold).
Software Updates
- Keep Windows updated. Windows Updates fix bugs and improve system stability.
- Install Lenovo updates. Use the Lenovo Vantage app or website to get drivers and firmware updates. These are important for how the hardware works.
Physical Care
- Keep liquids away from your laptop.
- Handle it gently. Avoid dropping it or hitting it.
- Keep the vents clean so the laptop does not overheat. Use compressed air to blow dust out of the fans and vents.
- Do not block the vents when using the laptop (e.g., do not use it on a bed or soft surface that blocks airflow).
By taking good care of your Lenovo Yoga, you can help keep it running smoothly and reduce the chance of startup problems in the future.
Fathoming the Lenovo Yoga Power On Sequence
Let’s take a quick look at what happens after you press the power button. This is the Lenovo Yoga power on sequence from a technical view.
- Power Button Press: You press the button. This signals the power management chip on the main board.
- Initial Power Check: The power management chip checks if there is enough power from the battery or charger.
- BIOS/UEFI Starts: If power is good, the main board starts the Basic Input/Output System (BIOS) or Unified Extensible Firmware Interface (UEFI). This is a small program stored on a chip. It checks the basic hardware (CPU, RAM, storage).
- Hardware Check (POST): The BIOS/UEFI runs a Power-On Self-Test (POST). It quickly checks if main components are present and working. If it finds a major error, it might stop and give beep codes or flash lights (Lenovo Yoga power light status can indicate this).
- Boot Device Selection: The BIOS/UEFI looks for where to load the operating system (like Windows). It follows a boot order (usually the main storage drive first).
- Operating System Loading: The BIOS/UEFI starts loading files from the storage drive to begin Windows (or other OS).
- OS Initialization: Windows loads its core files, checks hardware drivers, starts necessary services, and brings up the login screen or desktop.
This sequence happens very fast, often in seconds. Problems can occur at any stage:
- Stage 1-2 Problem: No power or main board issue. Laptop does nothing. (Lenovo Yoga won’t turn on, Lenovo Yoga power light status is off).
- Stage 3-4 Problem: Hardware failure detected by POST. Laptop might turn on (lights, fan) but show nothing on screen, or beep. (Lenovo Yoga screen black won’t turn on, Lenovo Yoga startup problems indicated by beeps).
- Stage 5-7 Problem: Issue with the operating system or storage drive. Laptop turns on, might show Lenovo logo, then fail to load Windows. (Lenovo Yoga startup problems, might see error messages on screen).
Knowing this sequence helps understand where the problem might be happening when your laptop fails to start.
Frequently Asked Questions
Here are some common questions about turning on Lenovo Yoga laptops.
Q: Where is the power button on my specific Lenovo Yoga model?
A: The Lenovo Yoga power button location varies. It is usually on the side edge (right or left), or in the top corner of the keyboard area (often top right). Check your model’s user manual online if you cannot find it.
Q: I pressed the power button, but nothing happened. What is the first thing I should check?
A: Check that the laptop is getting power. Make sure the charger is plugged into the laptop and a working wall outlet. Look at the Lenovo Yoga charging indicator light to see if it is on.
Q: My Lenovo Yoga turns on, the power light is solid white, but the screen is black. What is wrong?
A: This is a Lenovo Yoga screen black won’t turn on issue. The laptop is likely running, but the screen is not displaying. Try connecting to an external monitor via HDMI to see if the display works there. If it does, the laptop screen needs repair. Also, check if screen brightness was turned all the way down.
Q: How long should I hold the power button for a hard reset (power drain)?
A: Hold the power button for 15 to 20 seconds while the charger is unplugged. This drains remaining power.
Q: My Lenovo Yoga 7i won’t turn on. Are there special steps for this model?
A: The basic troubleshooting steps are the same for a Lenovo Yoga 7i won’t turn on as for other models: check power, try a hard reset, and check the screen with an external monitor. The power button and charging port locations might differ slightly.
Q: What does the Lenovo Yoga power light status mean if it is blinking?
A: A blinking power light usually means the laptop is in sleep mode. Blinking amber often means it is in sleep mode with a very low battery.
Q: My Lenovo Yoga makes beeping sounds when I try to turn it on. What do the beeps mean?
A: Beeping sounds on startup are error codes from the BIOS/UEFI. The pattern of beeps tells you which hardware component has a problem. You need to look up the specific beep code pattern for your exact Lenovo Yoga model online.
Q: How do I access the Lenovo Novo Button menu for recovery options?
A: Turn the laptop off completely. Find the small Novo button hole (often on the side). Use a paperclip to gently press the button. This will bring up the menu.
Q: What is the Lenovo Yoga initial setup?
A: The Lenovo Yoga initial setup is the process you go through the first time you turn on a new laptop. It involves setting up Windows (language, network, user account) and installing initial software.
Q: The Lenovo Yoga charging indicator light is off even when plugged in. What does that mean?
A: If the light is off when plugged in, it means the laptop is not receiving power. This could be due to a faulty outlet, a broken charger, a damaged charging cable, or a problem with the charging port or main board on the laptop.
Turning on your Lenovo Yoga is usually a simple press of a button. But if you face issues, walking through these steps, checking the power and status lights, and trying basic troubleshooting can help you identify and potentially fix the problem. Remember to take care of your laptop to avoid issues in the future.